How to make a fondant or gum paste (fire)bird
I have been meaning to post this posting almost 2 years ago, but I never actually got to it until today.
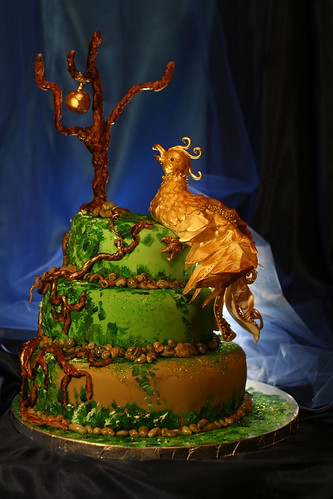
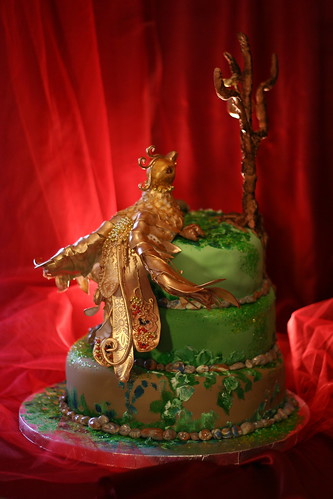
You all probably remember the Cake Challenges I organize in a Bulgarian forum. The second challenge had a “ Non-traditional story ( fairy tale) characters” theme. I chose to make a cake out of the Bulgarian version of the Firebird and the golden apple story.
The idea was long in my head but I was constantly switching designs. One time I wanted the firebird to be on top of the cake with open wings, another time to be down on the cake board reaching for the apple…I couldn’t make up my mind. Time was flying, I was so worried that I wouldn’t be able to actually make a bird. Although I never made one before I knew that it would take a long time to dry, so I had to finally make something.
So, I started with a simple sketch. I am sorry, I couldn’t find a picture of that sketch, although I am sure that the sketch itself is somewhere at home, because I usually keep the ones I do for my cakes, but basically it was a rough draft of how the firebird should look like.
I looked at a lot ( and I mean A LOT) of pictures of birds before I drew the sketch.
So, one day I just said, that would be it, I’m making it today and I started.
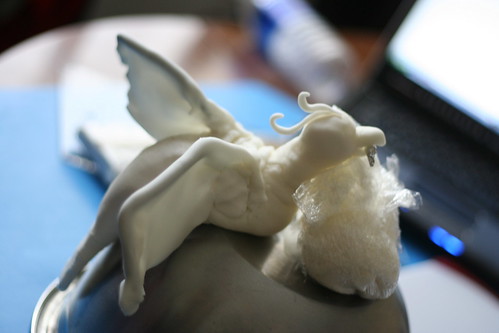
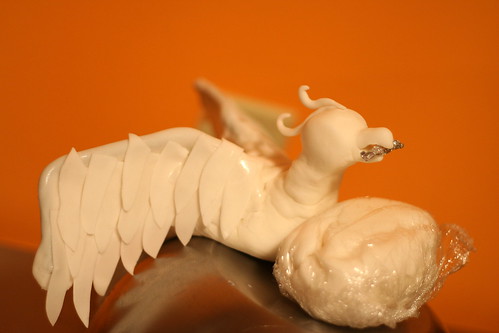
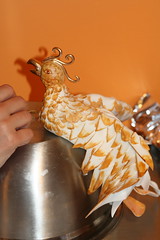
1. First I made the body- head and torso. Now that I am thinking, it would have been wiser to use gum paste instead of fondant but I started making fondant cakes very recently before that cake and I didn’t feel comfortable experimenting with a new material on top of a very complicated and absolutely new design for me.I used a very hard floral wire
 ( I can’t remember the actual gauge number, but it was the most thick one I found). You can very well use a stem of a fake flower
 or something too. So, I bent the wire in 5 places- 2 large “base bones” wit 2 bends for the wings and one in the opposite direction for the body of the bird and I left it to dry in a standing position.I covered the wings with a thin sheet of fondant
 At this point I had doubts that it would look any different than a parrot.
2. It took me about a week to dare to do anything else on the firebird. You probably shouldn’t wait so long, but have in mind that the fondant  has to be dry otherwise once you start applying the feathers theiy can break at the base. I wasn’t sure how should I do this, so I just started cutting and applying feathers.
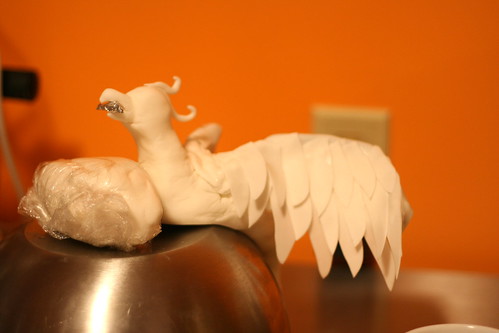
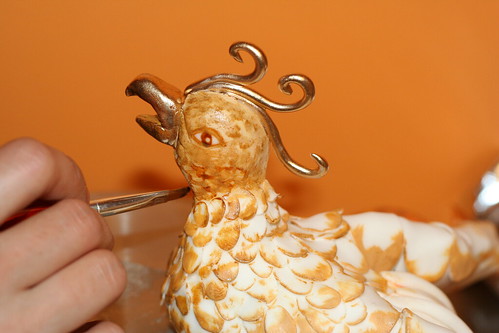
3.I have often been asked how did I cut the feathers. It is very simple. Roll out the fondant, cut straight lines lenghtwise, then cut them as long as your feathers would be and round the edges with a small pair of scissors . And no, I haven’t seen a cutter for feathers that would work. It took me good couple of hours to actually make that bird‘s feathers.
4.Remember that you have to apply the feathers row by row! Let the ones on the bottom dry a little, then add the next ones.And of course, you have to start at the bottom of the wings and go up. That’s how feathers grow I hear. 😉
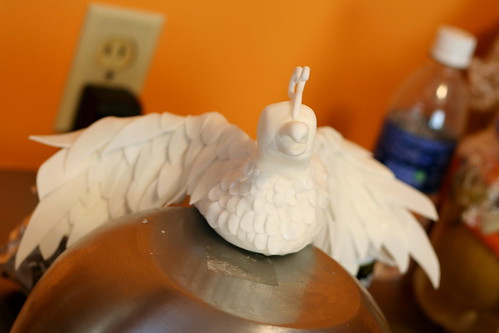
3. After I finished with the wings, I started applying the little feathers on the head and body of the bird. Man, that took F-O-R-E-V-E-R! I made small balls that I squished between my fingers and that’s how I came up with the idea of the small round feathers. They were A LOT! Again, you have to start from the bottom going up.
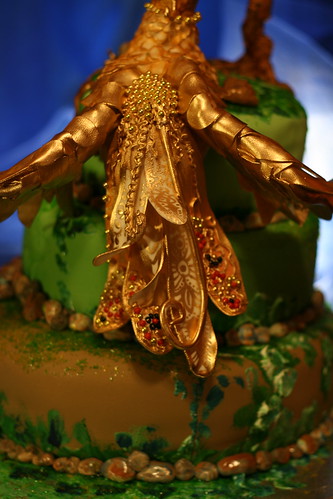
4. Then I started applying the feathers on the tail. Remember what I said about gum paste ? Yes, now was the time to use it..but I didn’t have any, so these damned feathers kept breaking up! They were long, they were thin, I didn’t have much time, so I applied layer after layer. Every night I made tail feathers, every morning I cried and threw them away, since they fell of overnight. Finally I managed to keep some of them together with a lot of Royal icing
 of course.
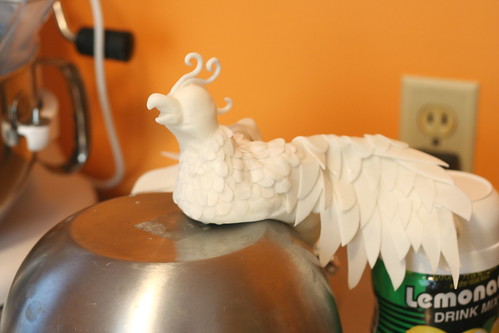
5.Why did I start with a white bird…i have no idea. Initially my idea was the bird to be red and orange, but I ended up thinking I should just “paint it” on top. Applying paint on the dried fondant in large quantities is never a smart idea, so if you can avoid it, please do. Otherwise you are risking to break some or all of the delicate feathers and everything goes downhill from there.
After I was done, I was pleased with the result. Then I looked again…and ..well…it was white. What was I going to do with a white firebird? I had to paint it, but how? Hence the problem with melting the dry fondant .
.
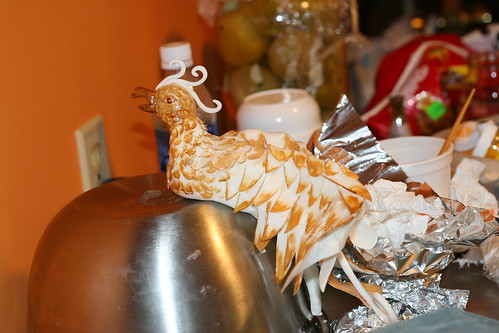
6. As you can see…it didn’t look that well. I started applying paint at the ends of the feathers…and it looked awful. I was devastated! Then I remembered seeing the glitter Scott Woolly had on his website. It was like melted gold!That’s what I needed! I called him and I almost cried on the phone! I ordered the glitter ( the cake was due Monday, I called Scott Friday) and somehow he, being a miracle worker saved me by sending it the same day, so I got it Saturday!I would be forever grateful to him about this! Not many people would do the same!
7. Once with the glitter in hands, it was easier to fix the look! I was pleased with the results right away! I started painting the whole bird and it didn’t melt, because I mixed the glitter with vegetable oil, not water. That’s what Scott recommends anyway.
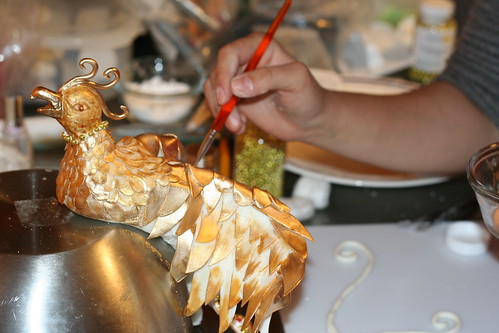
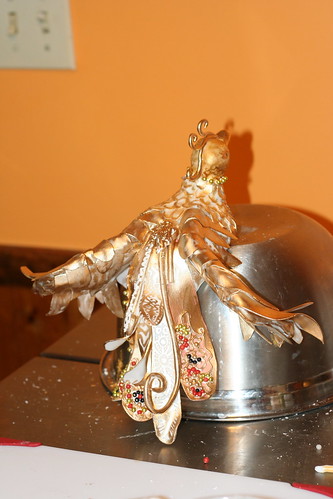
8. I used some royal icing to attach colored sugar balls ( candy dragee), the yellow, red and black ones on the tail. I drew designs on the tail with the brush, I didn’t have time to make stencils or anything. I still kept some shading on the feathers, didn’t completely cover them with gold dust
 I mean.
9. I left everything to dry and the next day, Sunday I added some finishing touches wherever needed. I probably don’t need to mention that I was dreading the moment I would walk in the kitchen next morning, to see if the whole thing is still holding up together.
10. Moving….That itself almost gave me a hearth attack. I have painted the whole cake, I’ve stacked it together…and there was no way I could move that bird to put it on top! I couldn’t ever dare touch it! It looked so fragile, so breakable…and so beautiful! I worked almost a week and a half on it, I couldn’t believe it can just break. Before I’ve taken pictures I mean! It could fall and break as long as it likes ,AFTER the pictures!So, I had to take the risk. My husband was holding he cake, I grabbed the firebird from the bottom of the body and placed it on the cake.
11. So far so good, but the bird was heavy and kept sliding of the edge. It was unstable to move and unless I secured it in some way, it would have gone on the floor the moment I tried to take pictures of it.
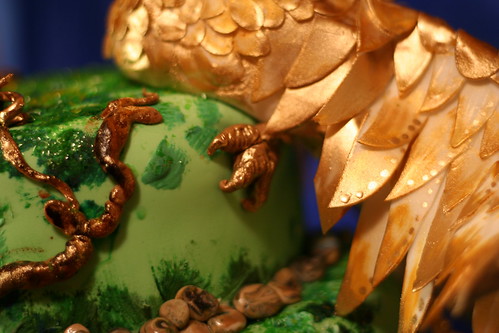
So, I had to put it back on the mixing bowl it dried on, place a wooden dowel in the cake and stack the bird on top of it.That did the trick and I added the claws. Finally I was able to take the pictures I wanted!
Is it necessary to say it was a huge success? 😉